Multi-factor Authentication, or “MFA” is a required security method for modern cloud based accounts.
How to set up Microsoft Authenticator:
- On your PC, visit https://aka.ms/mfasetup
- Sign into your M365 account using your email address and password
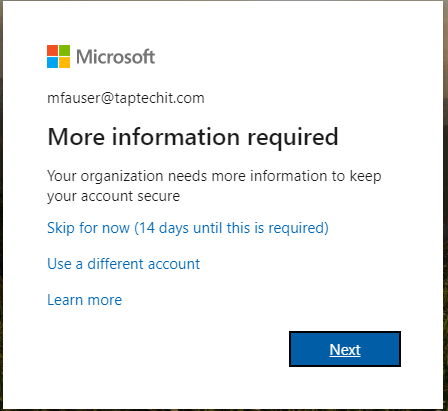
- You should see this prompt, please click “Next”
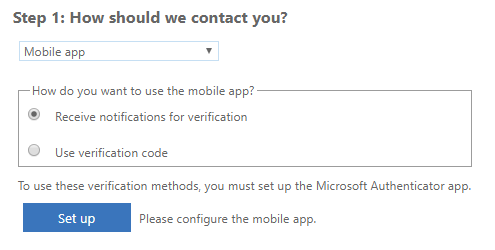
- Select the “Mobile app” option in the dropdown list. Click the “Receive notifications for verification” radio button, and then click “Set up”
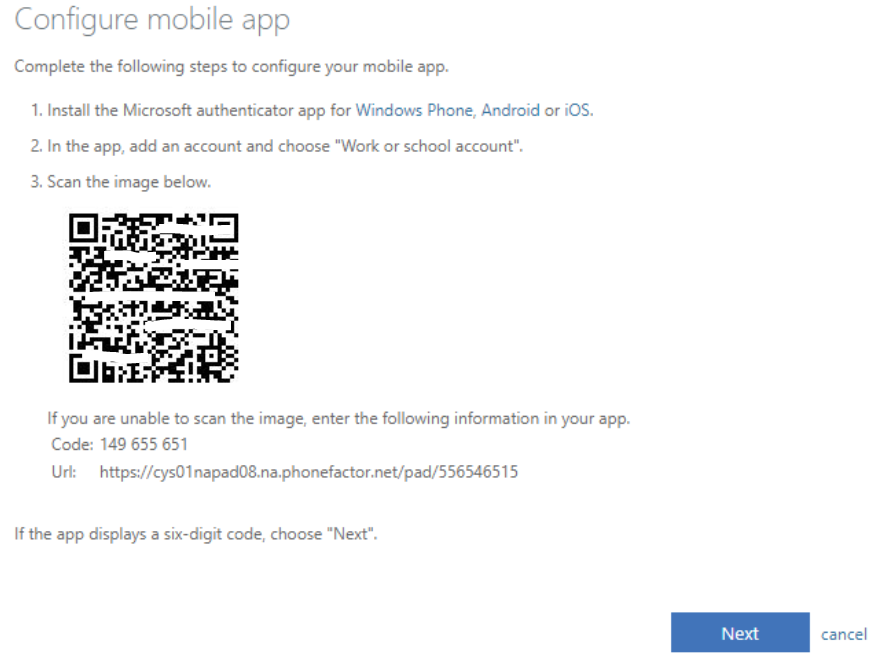
- Grab your smartphone and download the “Microsoft Authenticator” app in the store. Once it is installed, you can move onto the step below.
- Within the Microsoft Authenticator app, you may need to allow permissions first. Allow/approve all permissions. Tap on the “Add account” or “+” and then “Work or school account.”
- Tap “Scan a QR code”
- The app should open up your phone’s camera, which you can aim at the QR code that is on your computer. DO NOT aim the camera at the QR code in this guide below.
- Click “Next”
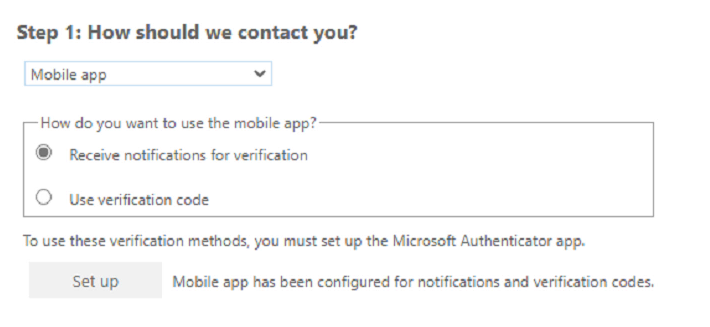
Make sure that “Mobile app” is selected and the “Receive notifications for verification” radio button is selected, and then click “Next.”
Tap the “Approve” button when it appears on your phone.
In the next steps you can add your mobile phone number, which can be used in case your Authenticator app malfunctions or your phone is replaced.